Saltine Crack Ice Cream Sandwiches
- Total Time: 65 minutes
Description
I’m super behind in posting – I made this in the middle of the summer! – but what can you do? There are too many tasty things to make in this world and Smitten Kitchen alone could overwhelm you with wonderful ideas. I’m not sure how Deb Perelman does it, but here’s another smash hit…lots of instructions, read them carefully, nothing difficult. Below is my doubled recipe, because why the heck would you go to all of the trouble and not make as many as you can? They live in the freezer after all – enjoy!
Ingredients
Saltine Crack Ice Cream Sandwiches
2, 9 x 13 metal cake pans lined with foil and then lightly sprayed with cooking spray
48 regular, salted saltines
1 c. butter, cut into pieces AND 1 c. packed brown sugar
1/2 t. vanilla
2 c. + chocolate chips (or chopped dark chocolate, just make sure it’s good chocolate!)
1 1/2 c. sliced almonds, toasted
flaked sea salt – I used Maldon
Instructions
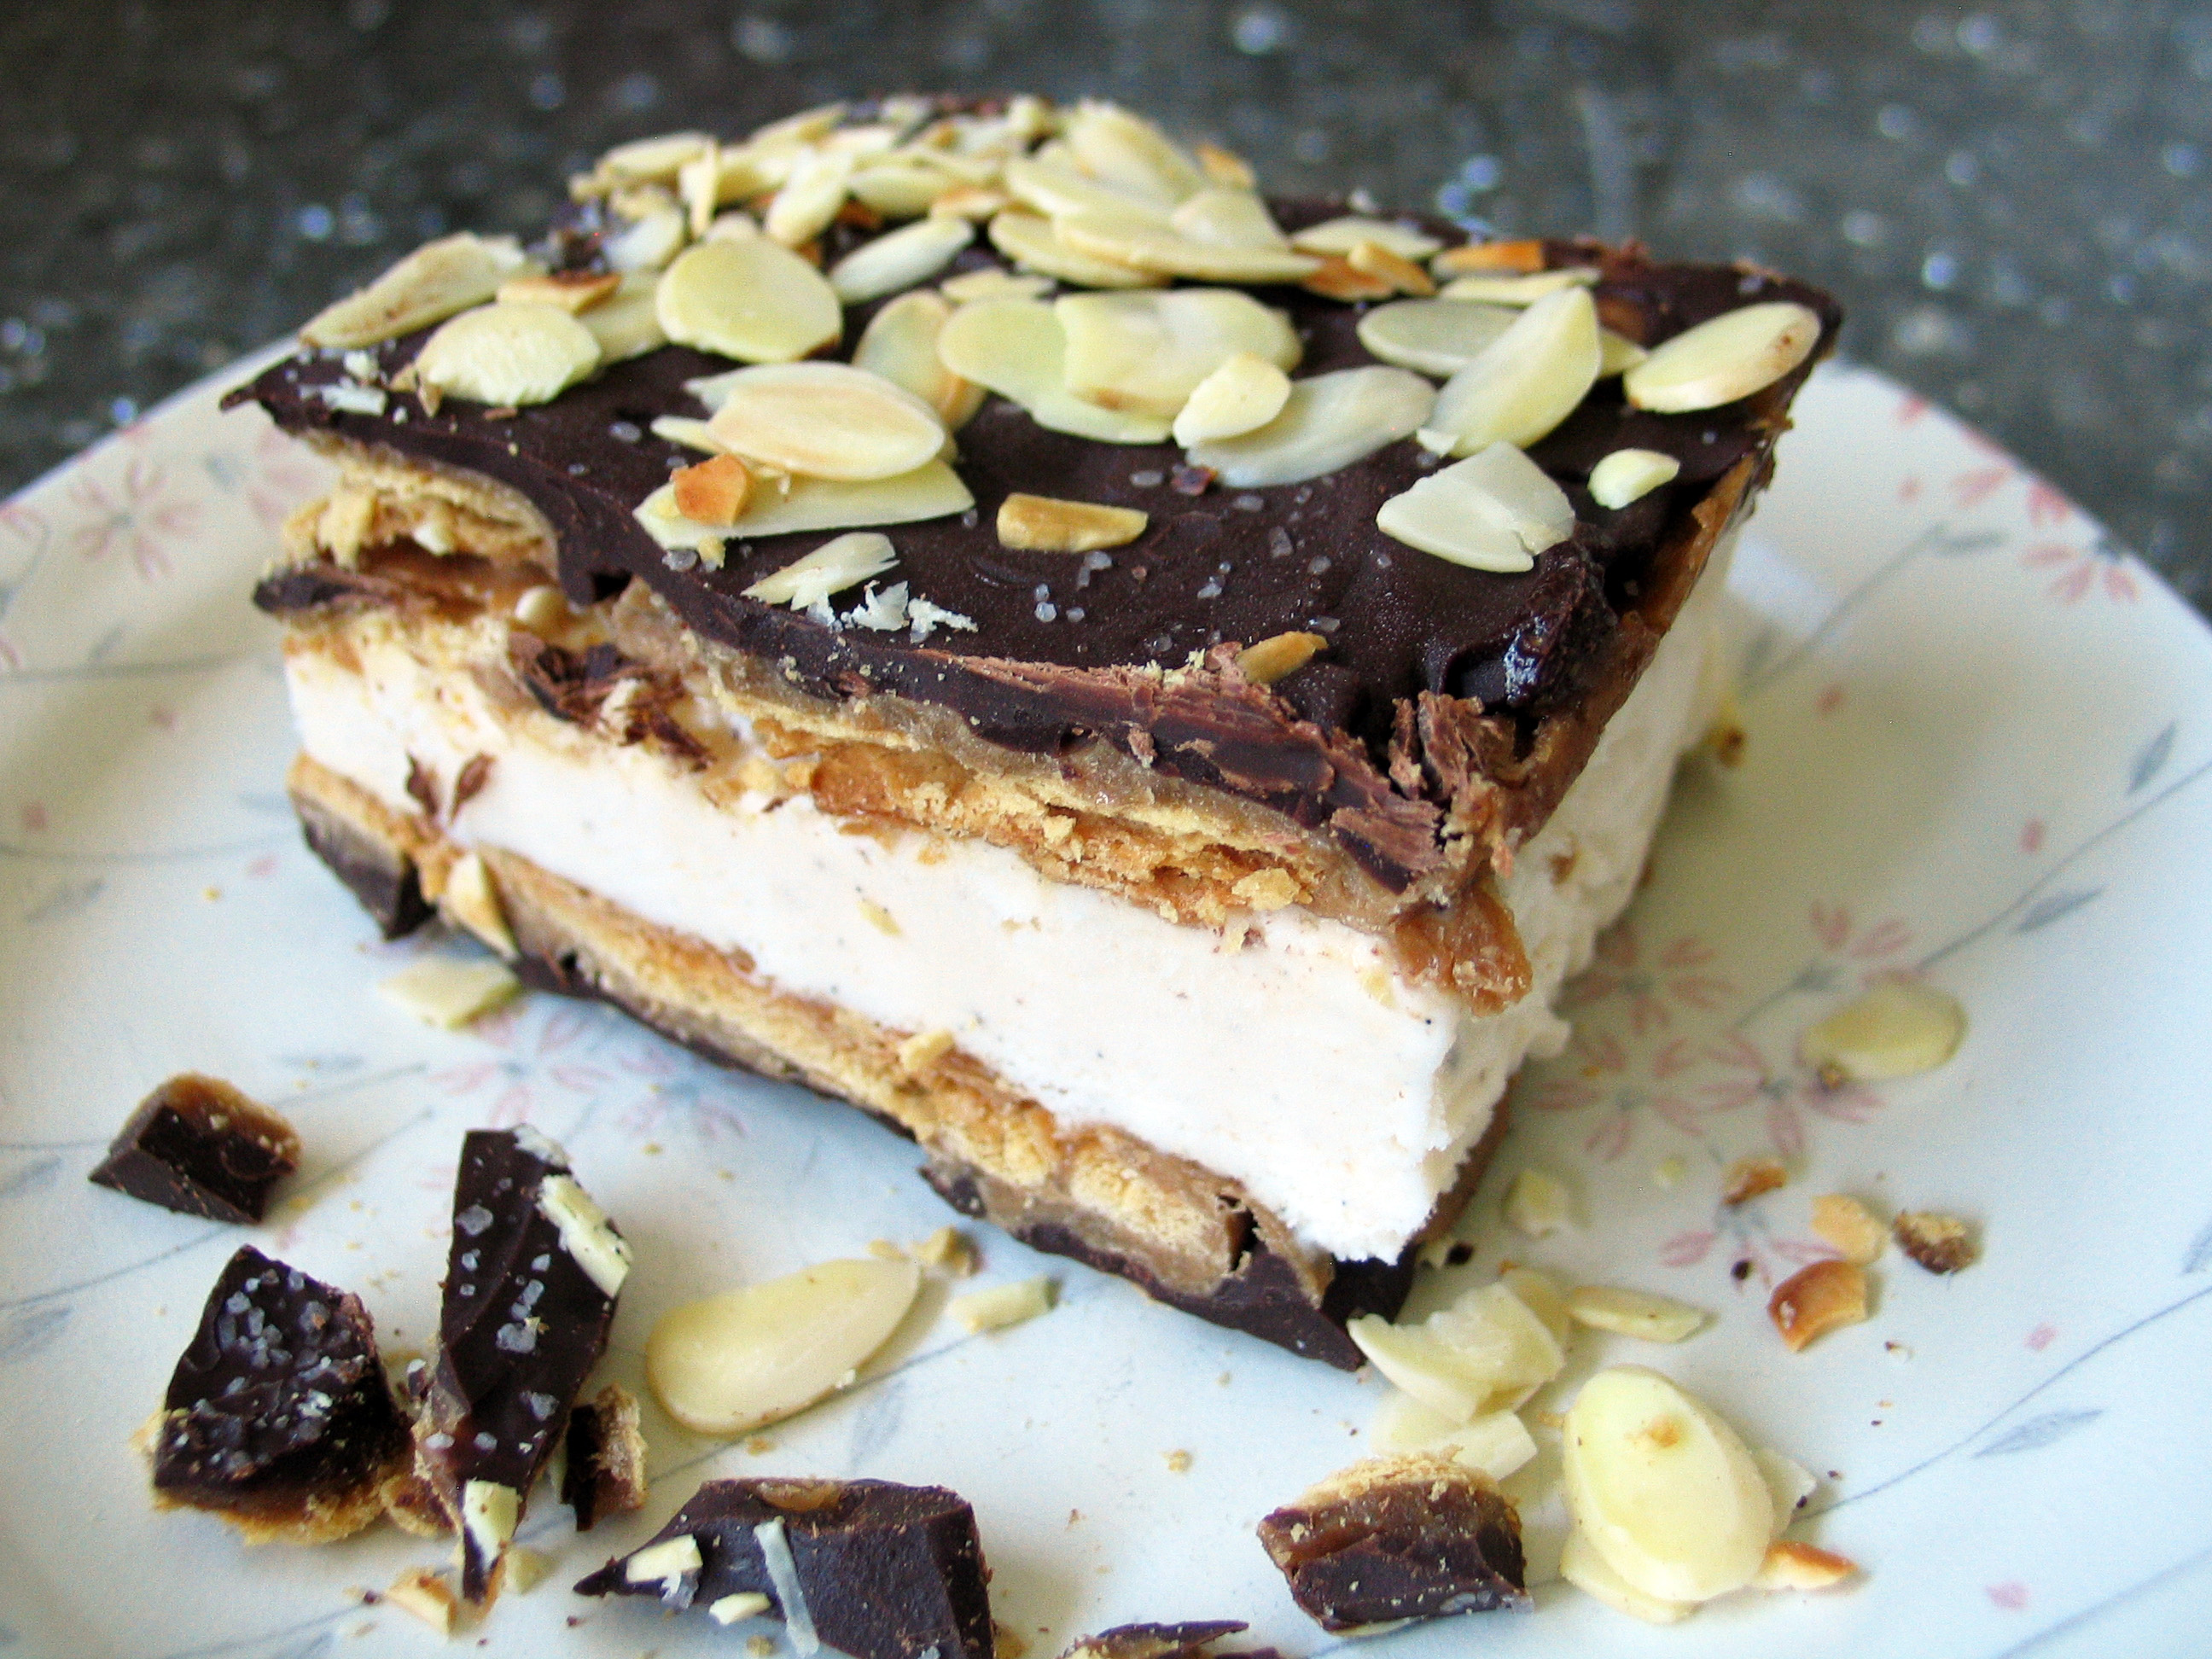
Preheat the oven to 350 and line the prepared pans with the crackers. Mine fit neatly into a 4 x 6 pattern with no overlapping – make sure they fit your pans as perfectly as you can, cut the crackers if you have to. Make the toffee – in a medium pot, melt the butter and brown sugar together, stirring until it comes to a boil and then whisk to bring the butter and sugar together for 2 or 3 minutes. Remove the pot from the heat and stir in the vanilla, then pour this mix evenly and quickly over both prepared cracker pans. Use a spatula to smooth out the toffee as much as possible, then bake both pans for 10 to 15 minutes (check at 10 minutes!) until the toffee and crackers are bubbling, but not dark or too brown.
Remove the pans from the oven and sprinkle on an even layer of chocolate chips. Allow the pans to sit for about 5 minutes so the chocolate can soften, and then use another spatula to carefully and evenly spread out the chocolate, like icing – a nice thin layer will work out better for you in the end, so don’t go crazy with the chocolate chips! While the chocolate is still warm, sprinkle on the toasted almonds and then finish both pans with a fine dusting of sea salt. Transfer the pans to the freezer for about an hour.
Ice cream! – I used a 1.66 L container of Breyers French Vanilla – set it out on the counter about 15 minutes before you need it to make sure it’s spreadable
Take the crackers out of the freezer and use the foil to lift out the layers in one piece – remove the foil. Now line one of your 9 x 13 pans with a couple of layers of plastic wrap. Place one of the cracker layers upside down into the plastic wrap lined pan, so the chocolate/almond side will be facing down. Evenly spread all of the ice cream over this cracker layer and then carefully place the second cracker layer on top, chocolate/almond side up. I gently pressed the top cracker layer down evenly all over and was able to get a very even sandwich block. Cover well and return to the freezer for several hours, preferably overnight.
Cutting the sandwiches…a large serrated knife, time and patience work the best! Take the whole block out of the pan, remove all of the plastic wrap and place it on a large cutting board. Start by cutting it in half and setting the half you’re not cutting up into the freezer as it will melt quickly. Cut each block into even-sized sandwiches (they won’t be perfect! NO ONE will care!), then wrap the individual sandwiches in plastic wrap, put them into a big Ziploc or container and freeze until you serve them. I highly recommend eating these outside!
- Category: Ice Cream, Freezes Well, Make-ahead, Sweets
The best ice cream sandwich I have ever tasted!
Very tasty. We melted the chocolate in the microwave and then poured it evenly over the caramel layer–no need to heat the oven on a hot day that way! The toffee set perfectly without baking. Perhaps baking would have done something useful for the crackers–would it have made them softer by absorbing more of the caramel? Hmm. Using parchment paper worked really well. There was some improvising going on as the 9-year-old was in charge and was confident she could remember all the steps without consulting the recipe! Everything worked out in the end and these yummy ice cream treats disappeared very quickly!